Introduction
Many hosted PBX features are designed to make it easier to reach people. After all, the whole idea of a voice service is to bring people together as quickly and clearly as possible. But sometimes calling boundaries can improve your office’s efficiency.
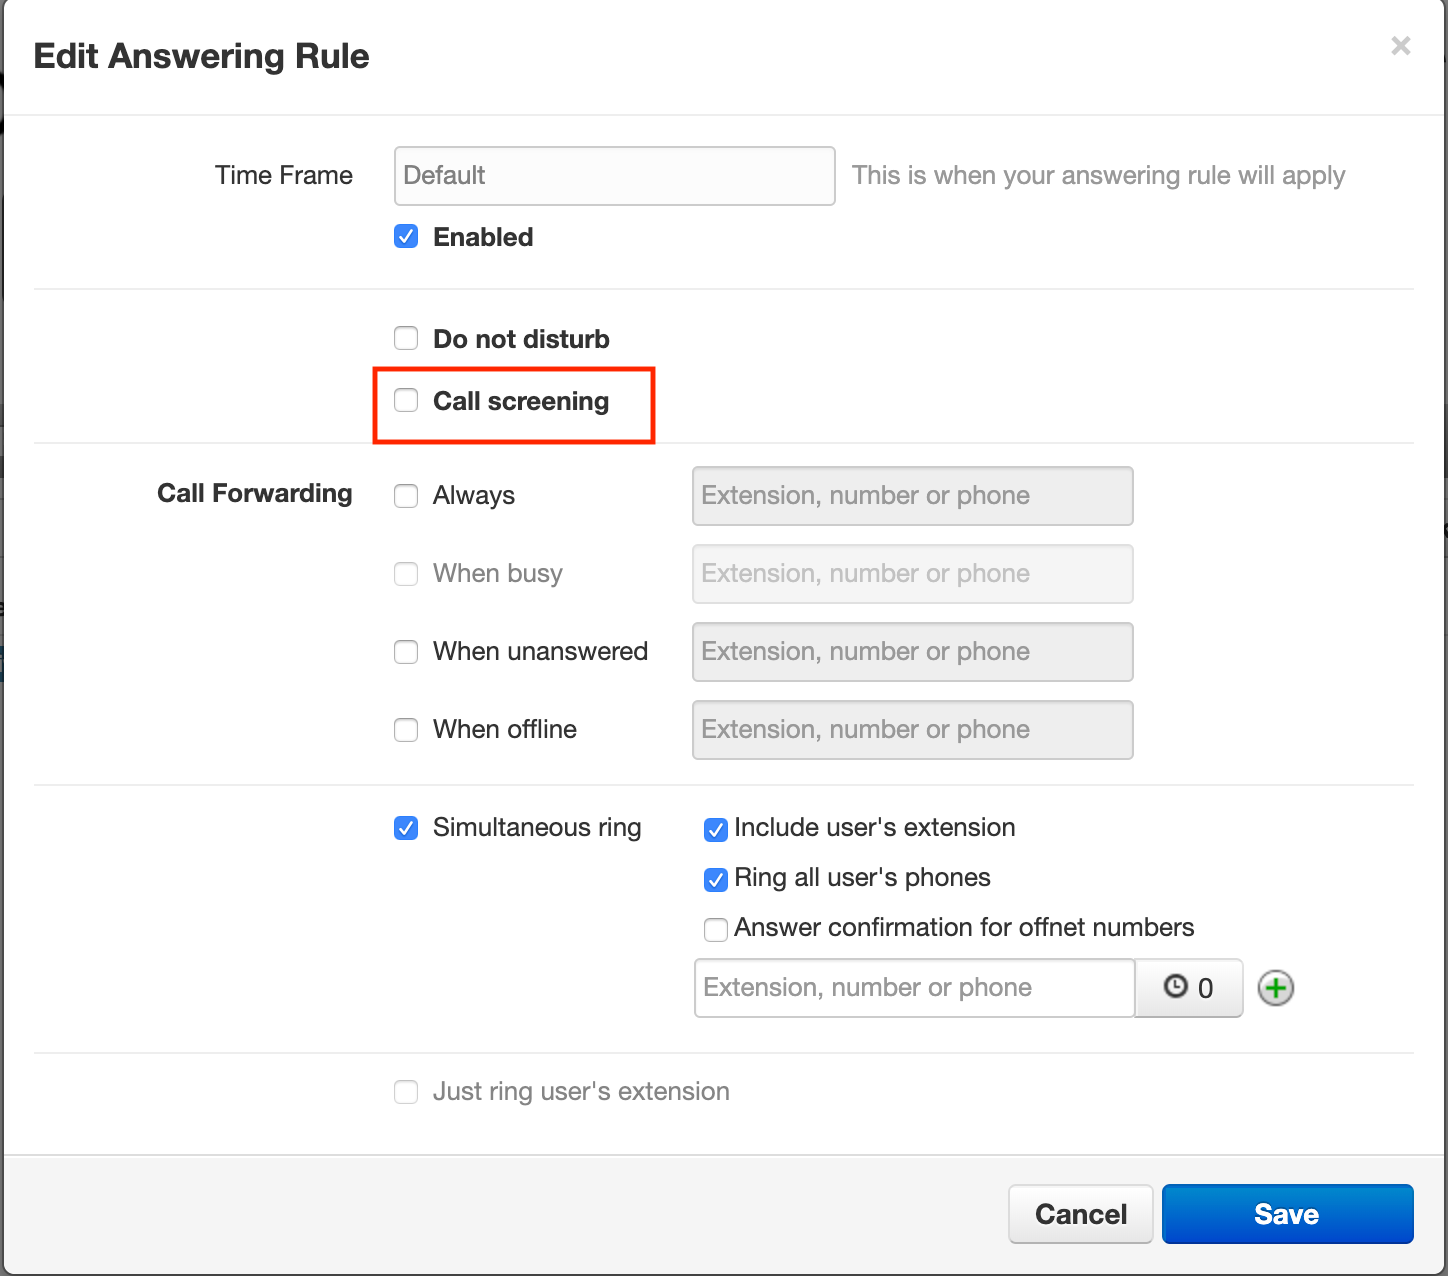
Call screening, for example, forces a caller to say their name before the recipient answers. This is useful when it comes to remembering customers’ names, juggling many inbound calls, or helping direct/transfer callers to the right place.
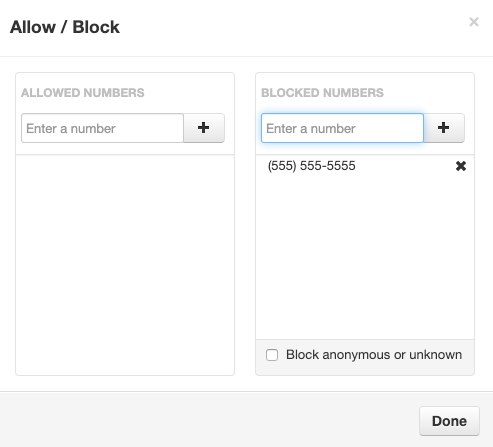
Call blocking, on the other hand, makes it so a specific number doesn’t ring through. If you decide to block a number, that caller won’t be able to reach you. Instead, they’ll get a busy tone or number disconnected message.
You can set up both of these features in the Pilot voice portal.
How to turn on call screening
Step 1: Log in to the Pilot Voice portal. Your Login Name will be in the format of extension@domain.
- Note: If you’re an admin, once logged in, click your name in the top corner and select My Account from the dropdown options.
Step 2: Select Answering Rules from the navigation. Then click Add Rule.
Step 3: Check the box for the Call Screening option. Click the Save button to start using the feature.

How to block calls from a specific number
Step 1: Log in to the Pilot Voice portal. Your Login Name will be in the format of extension@domain.
- Note: If you’re an admin, once logged in, click your name in the top corner and select My Account from the dropdown options.
Step 2: Select Answering Rules from the navigation menu. Then click Allow / Block to display numbers in each column.
Step 3: Type in the number(s) that you want to block, then click the + button to add them to your blocked list. You can also select the Block anonymous or unknown option to prevent those calls altogether.
Step 4: Click the Done button to save your lists.

Conclusion
Congrats—you’ve just boosted your calling efficiency! If you want to learn more about answering rules, check out some of these articles.

