Introduction
Congratulations on getting your new SonicWall TZ 350 firewall! This guide will walk you through the initial, out-of-the-box setup for your device. Let’s get started!
Setting up your SonicWall TZ350
Step 1: Open your new SonicWall device. The box should include your SonicWall firewall, a power adapter, and an ethernet cable.
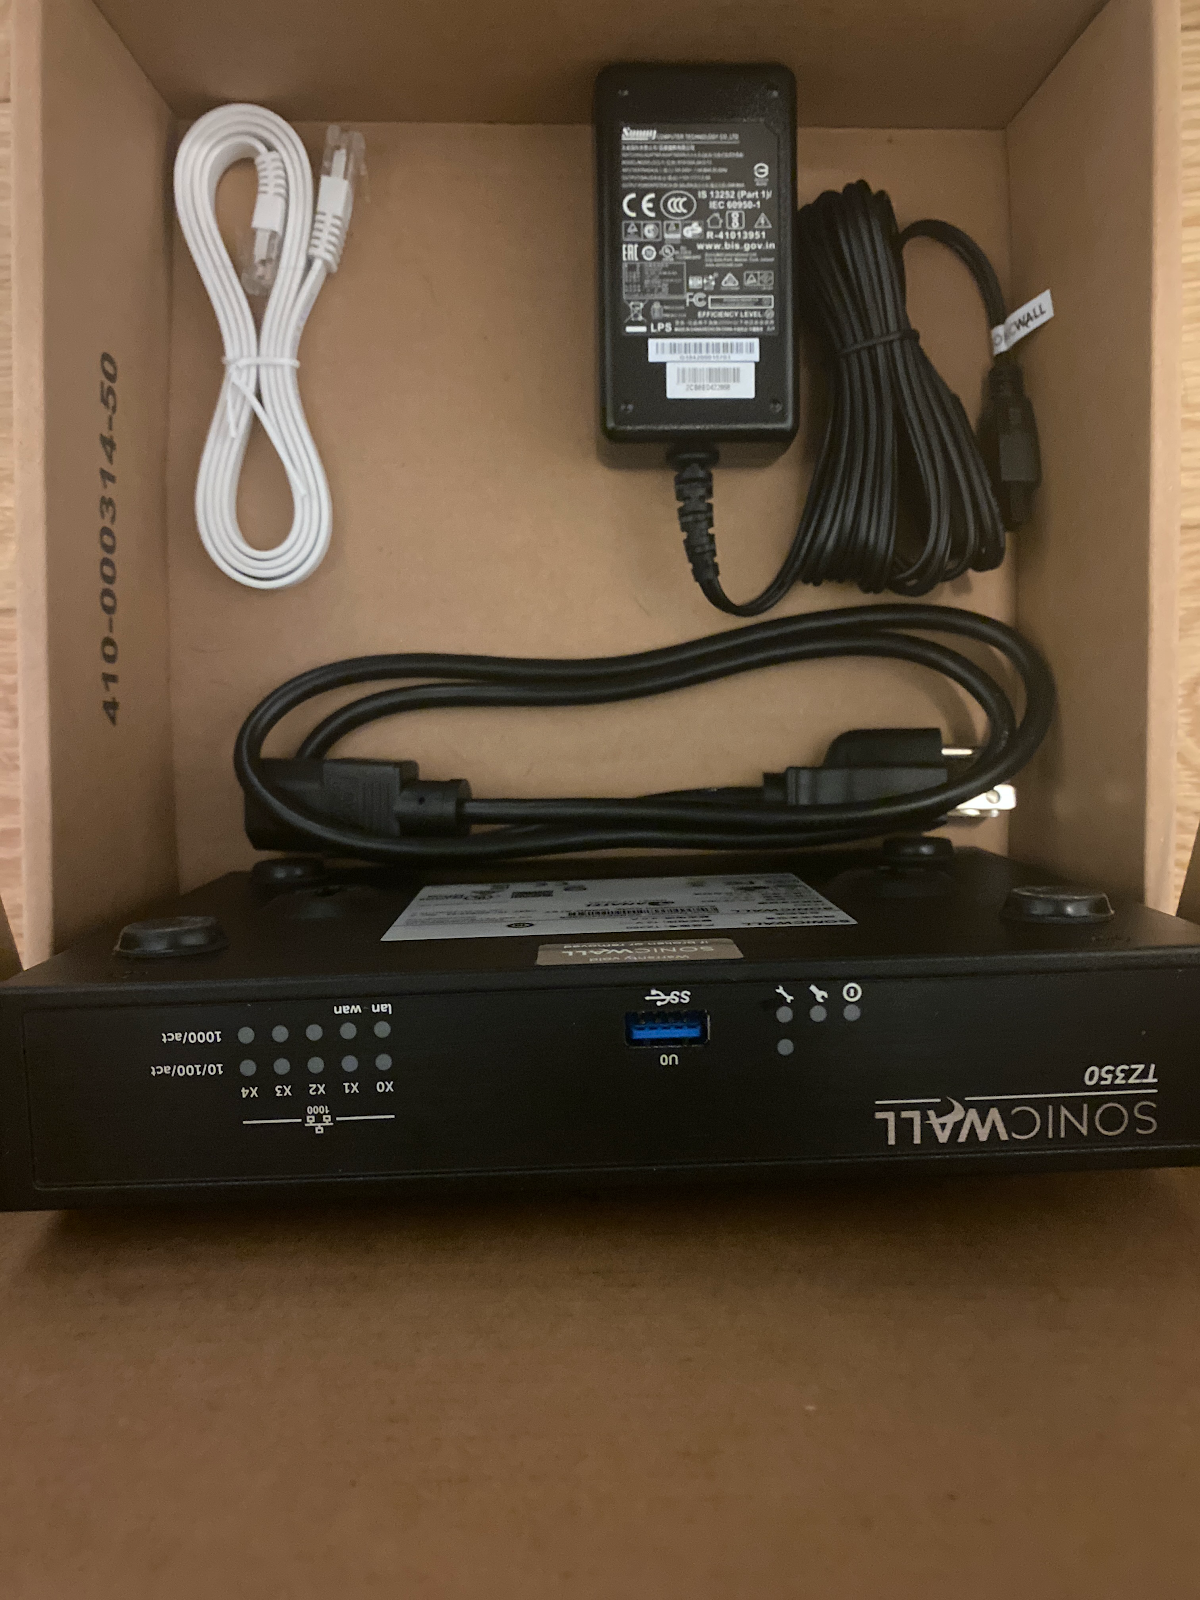
Step 2: Plug your SonicWall Device into a power outlet by your modem.
Power Cable to the right of the device in the picture below
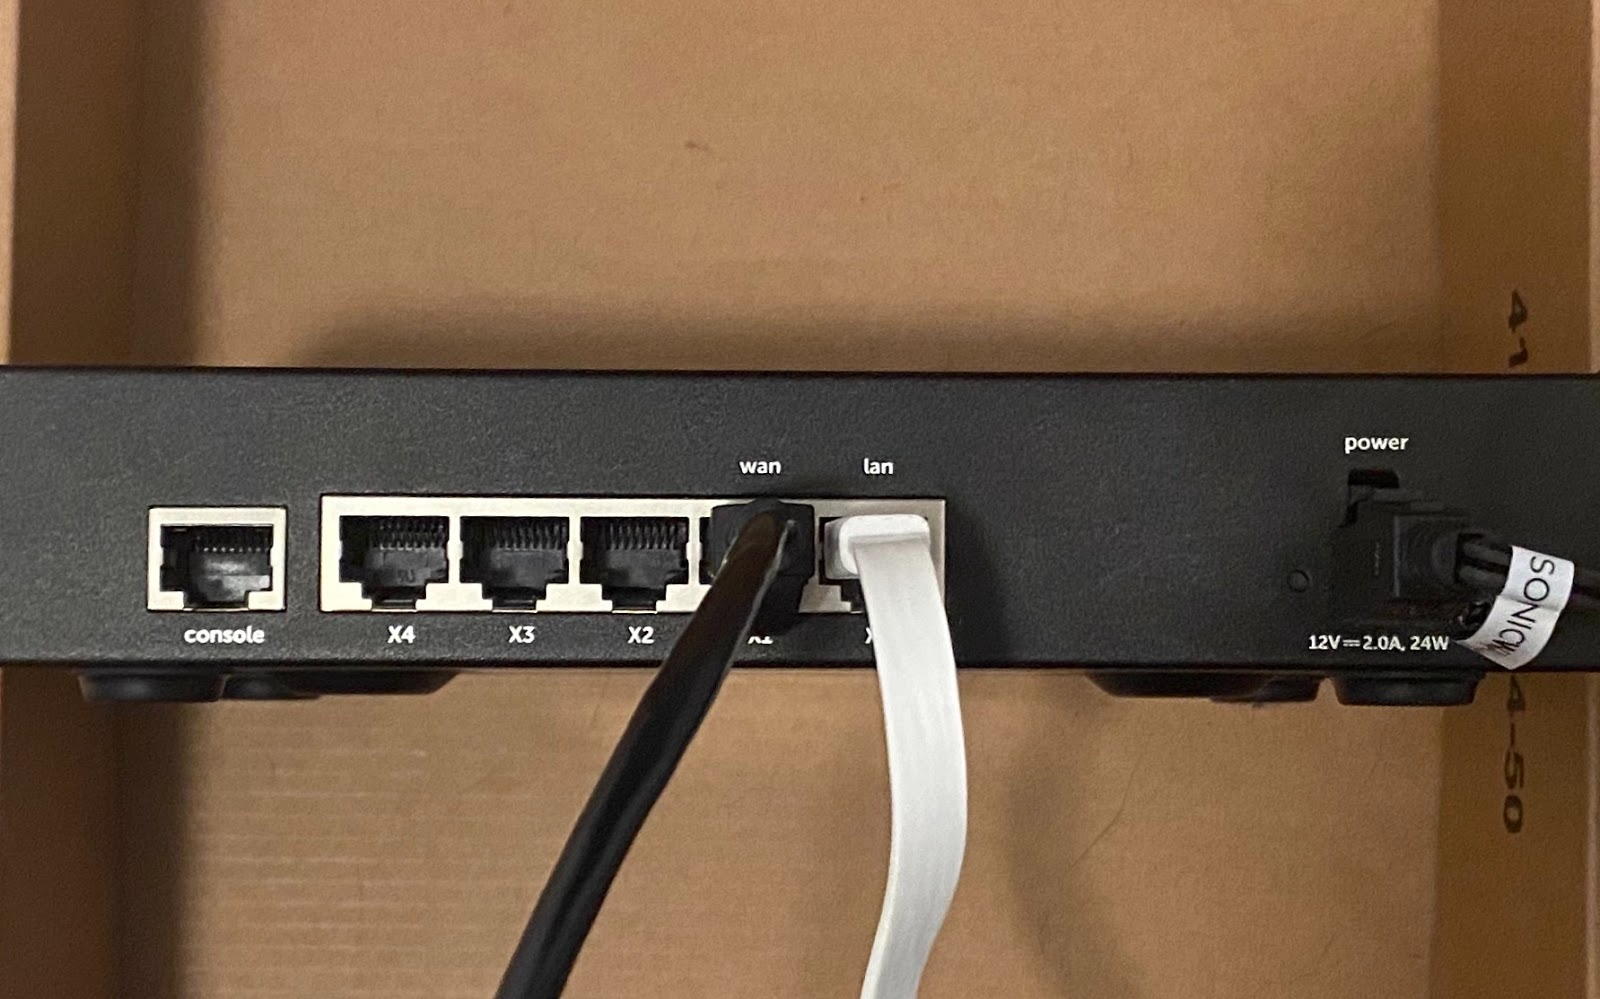
Step 3: Connect the WAN Interface (X1) into your modem using an ethernet cable.
Black cable in the picture below.
Step 4: Connect the LAN interface (X0) into your computer using an ethernet cable.
White cable in the picture below.
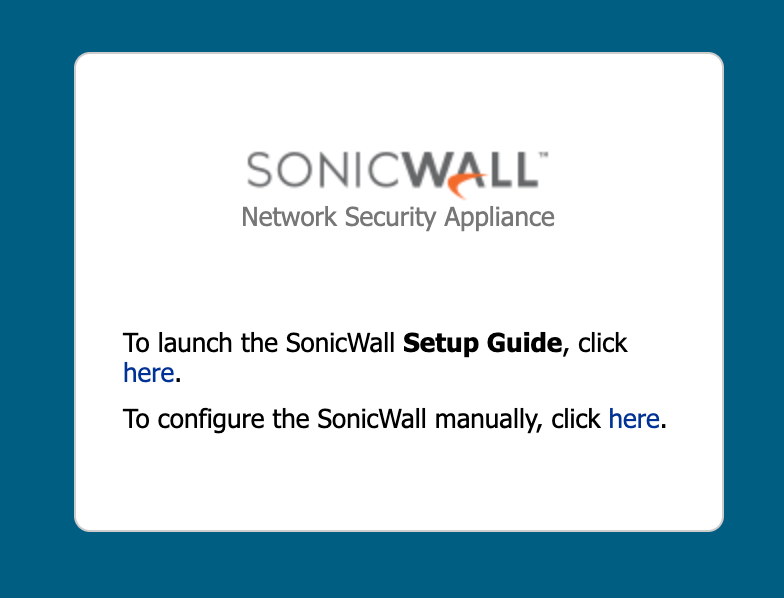
Step 5: Once connected, open your browser and navigate to https://192.168.168.168.
Click on “To launch the SonicWall Setup Guide, click here.”
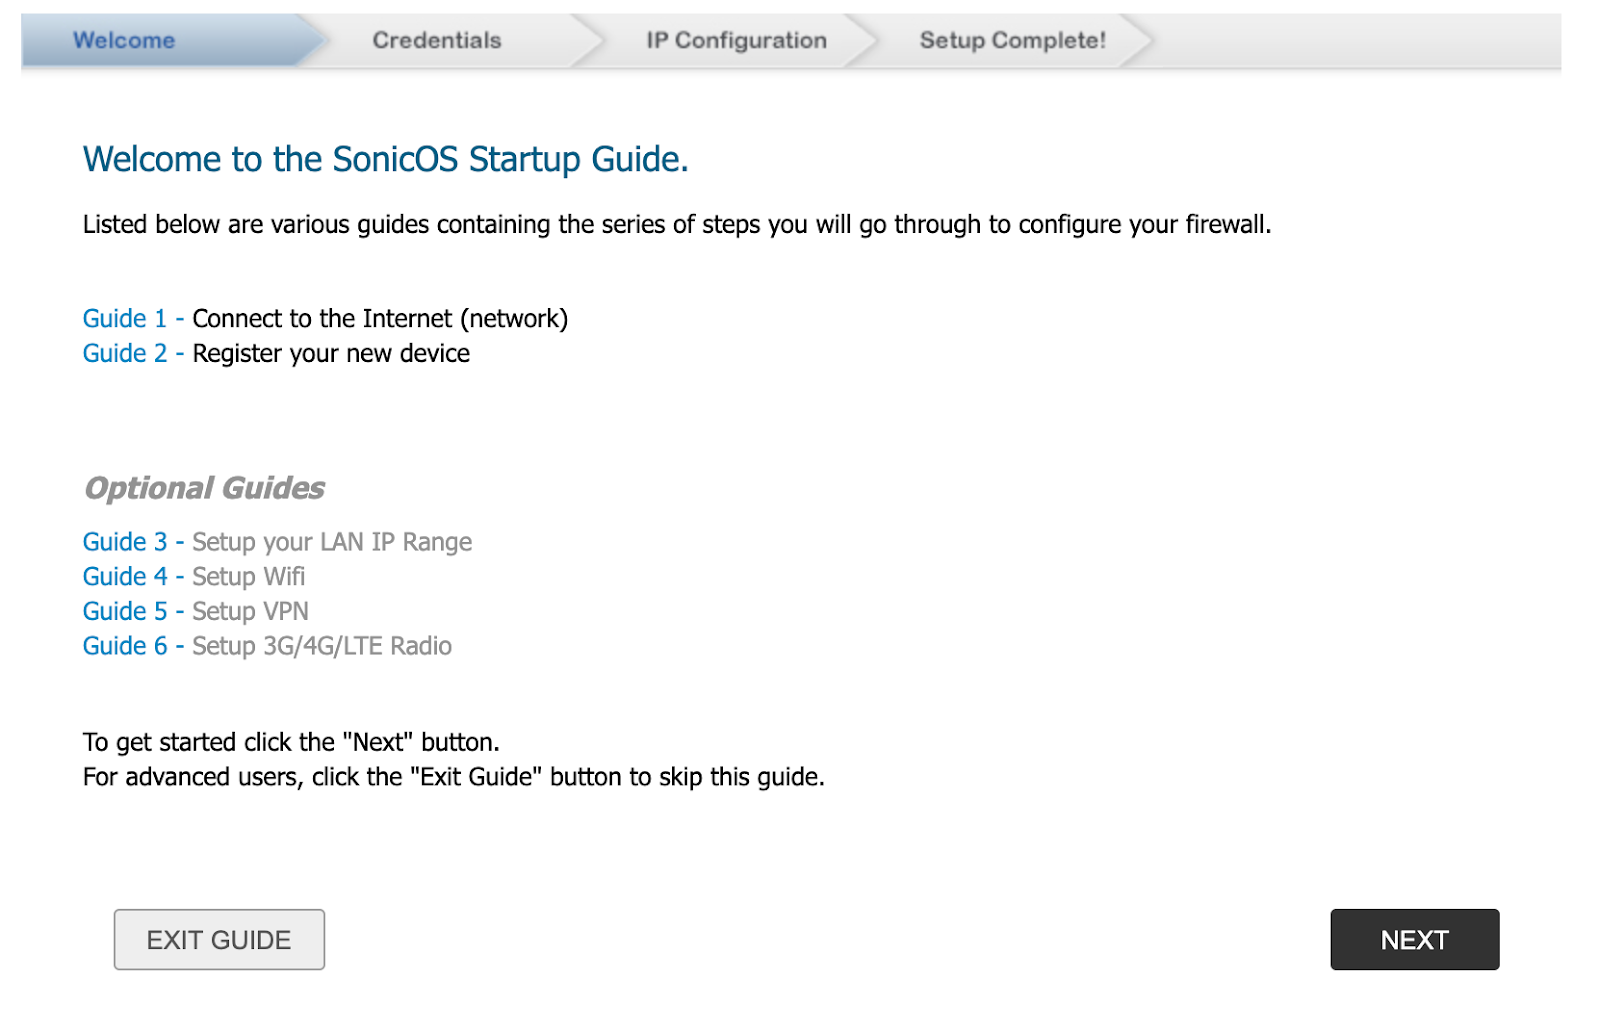
Step 6: Welcome to the “Welcome Page”! You can click “Next”, or check out a SonicWall guide or two!
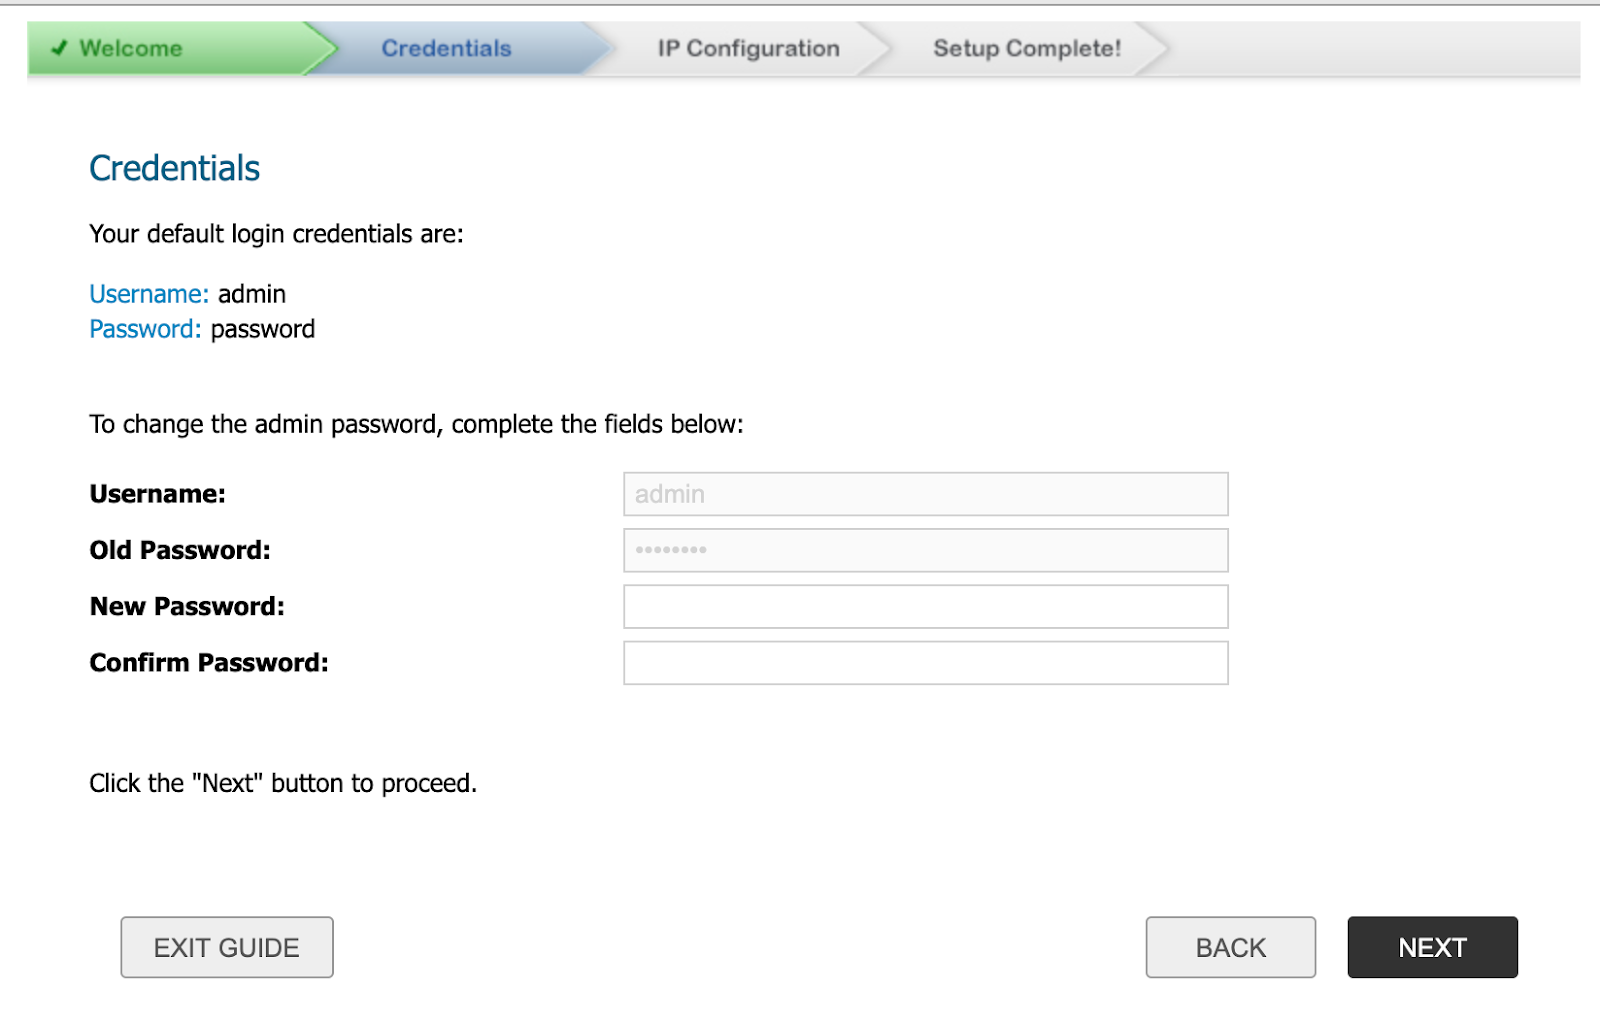
Step 7: Set up your login to access the device. Feel free to leave everything blank if you want to keep the default SonicWall login credentials (Username: admin, Password: password). Click “Next”.
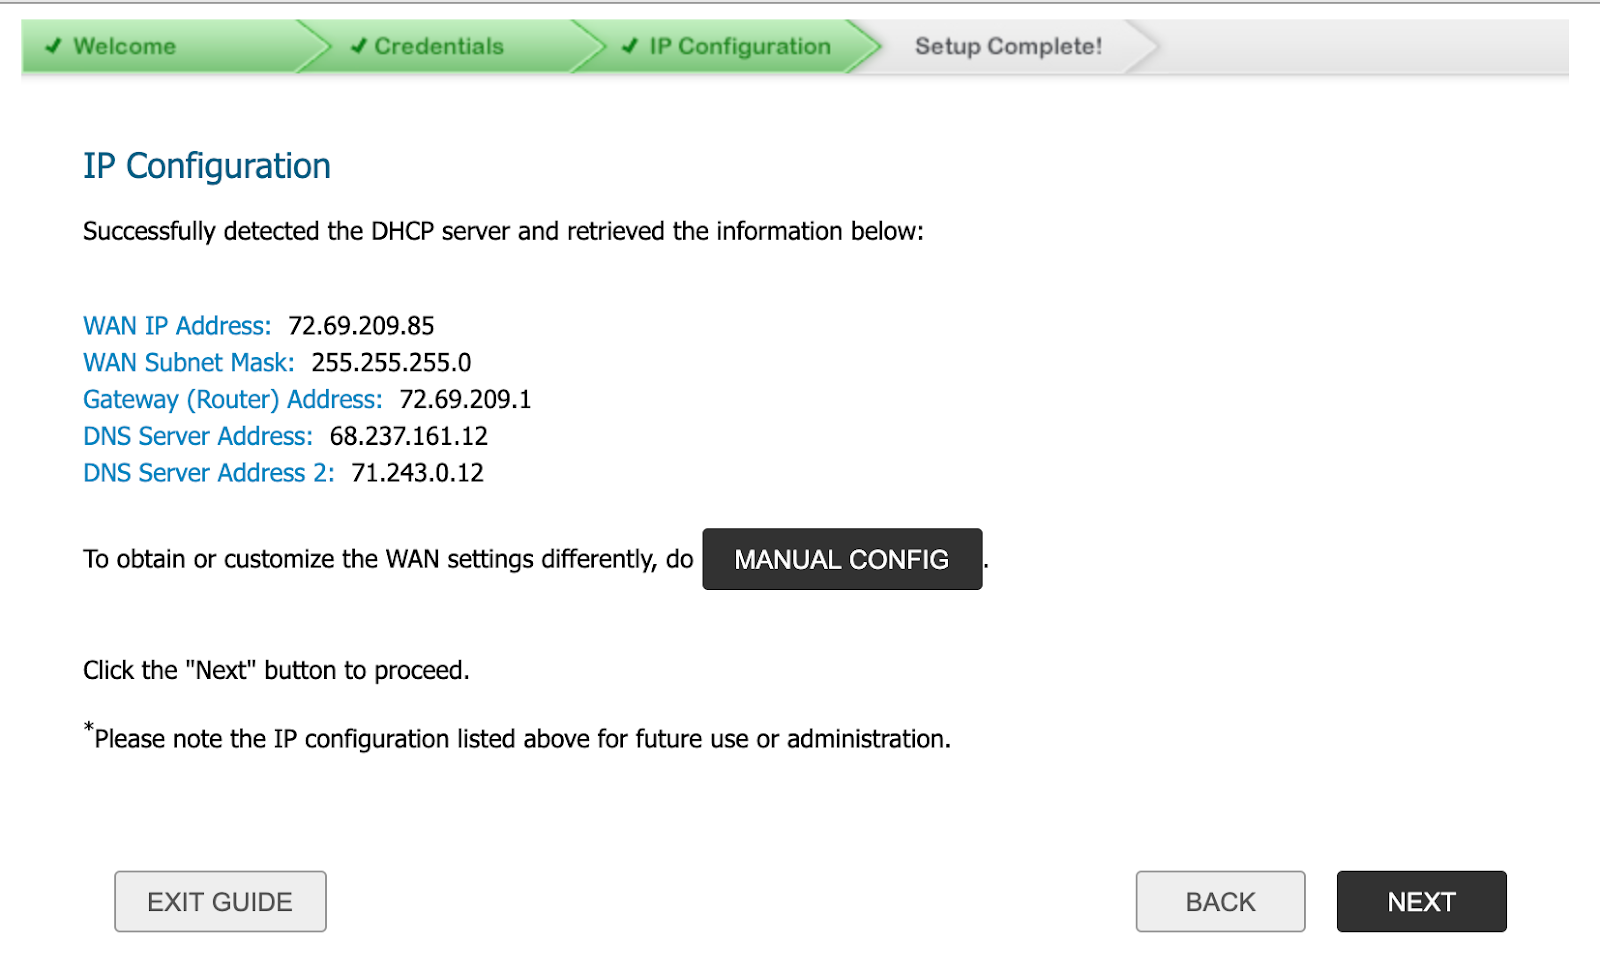
Step 8: This is the step where your firewall will connect to the internet! If your provider is using DHCP, you will see the page below. Feel free to click next.
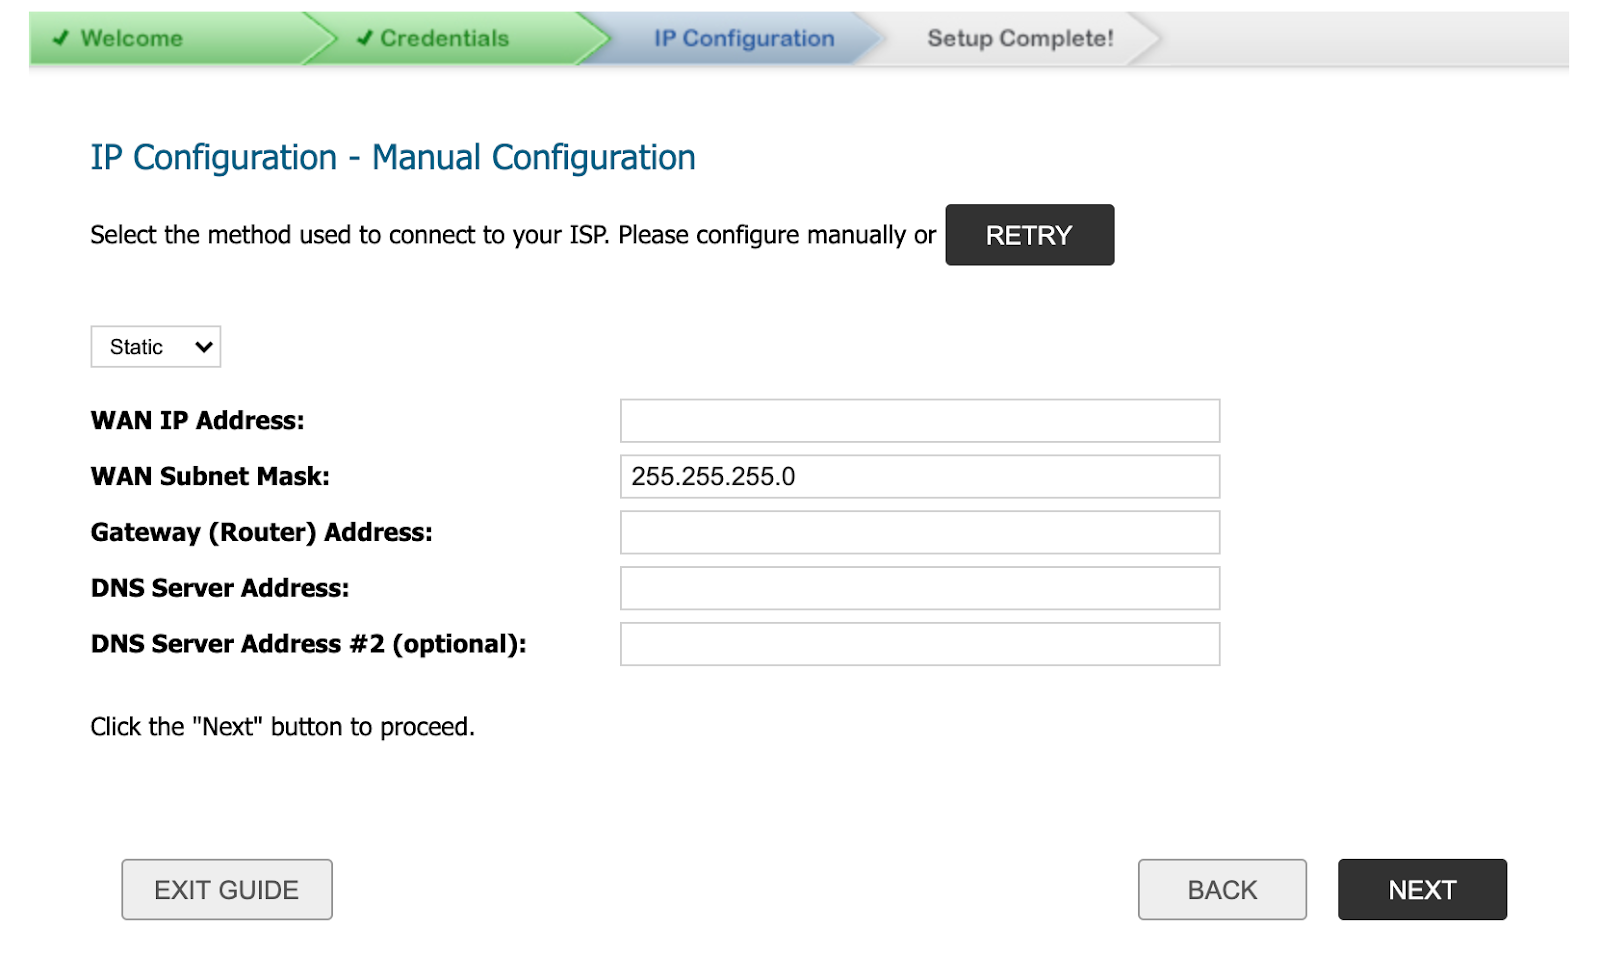
If you want to set up a static IP on the device, click “Manual Config”, and then enter your Static IP information! Click next when it’s all set up.
Step 9: Confirm your IP Information, then click “Done”
Conclusion
Your SonicWall TZ firewall is now set up and your device is connected to the internet! If you want to make any further changes, check out our other SonicWall support articles.