Introduction
One of the best things about Pilot Voice is its flexibility. End-users and admins alike can edit how their Polycom digital screen is set up using SNAPbuilder. This is a tool that makes it easy to customize buttons on a specific device, deploy and bulk edit templates, and add directories or multiple lines to a single handset.
Navigate to the SNAPbuilder and select handset (office admins)
Step 1: Log in to the Pilot Voice Portal. Your login name will be in the format of extension@domain.
Step 2: Select the Inventory from the main navigation menu.
Step 3: Click Phone Hardware, then the SNAPbuilder button. 
Step 4: With the SNAPbuilder Launcher open, navigate to Edit Phone Configuration and search for the phone you’re updating. You can search by extension number or the phone’s MAC Address (found on the back of the phone). When you locate the phone, press Start.
OR
From the Inventory tab, click Phone Hardware. Then click the gear icon next to the phone you’re trying to access.
Navigate to the SNAPbuilder and select handset (basic users)
Step 1: Log in to the Pilot Voice Portal. Your login name will be in the format of extension@domain.
Step 2: Select the Phones tab from the main navigation. Then click the gear icon ![]() next to the phone you’re trying to access. Then proceed to the SNAPbuilder.
next to the phone you’re trying to access. Then proceed to the SNAPbuilder.

Using SNAPbuilder to configure the handset’s buttons
Step 1: Once you’re in the SNAPBuilder, regardless of your permissions set, you’ll see the screen below. You can now adjust buttons according to your preferences.
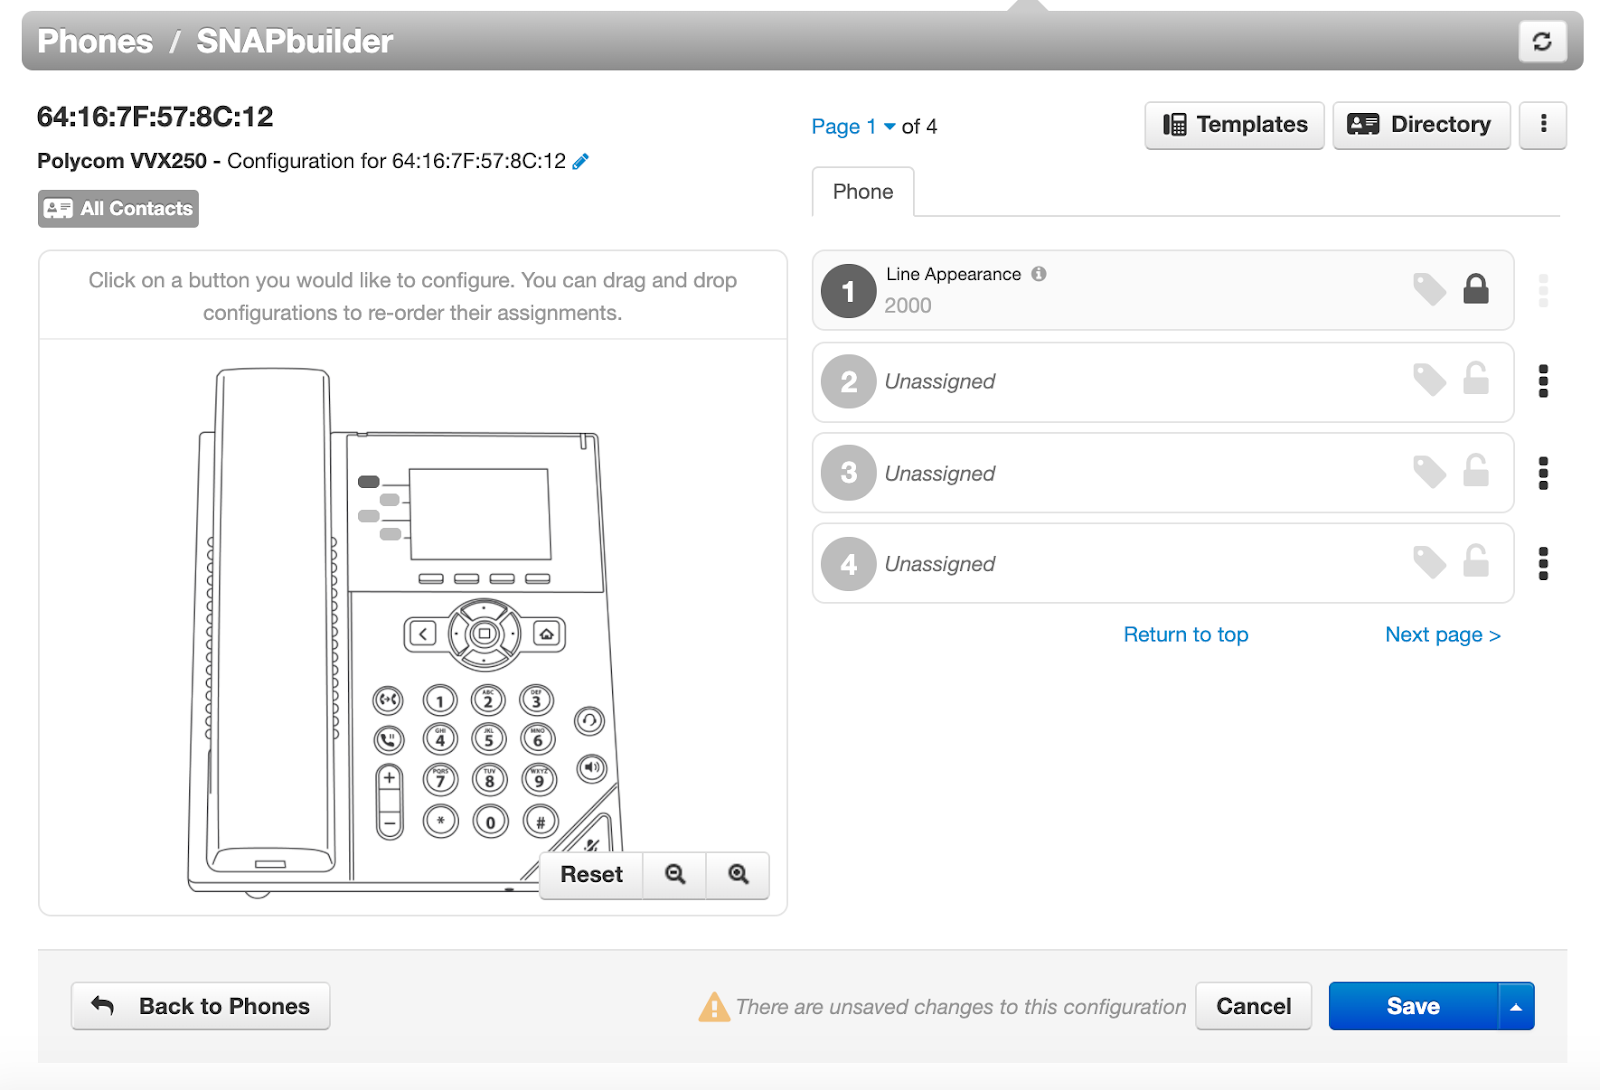
Button 1 should always be set to Line Appearance, do not change it.
On the SNAPbuilder page, you can see how many buttons are able to be customized based on the type of phone.
Click on any button number and you will see Select a Feature, which include:
- Line Appearance - line registration to the device. Your phone should have no more than 1 Line Appearance.
- Shared Line Appearance - add a shared line that can be added to multiple devices
- Users (BLF) - see the present status of another extension, can also be used to call the extension (more on configuring BLFs here)
- Call Park - park an active call and use the same button to retrieve the call later
- Speed Dial - call a specific destination, either on-net or off-net
When you add a button, you also can create a Custom Label so that the button displays whatever text you prefer.
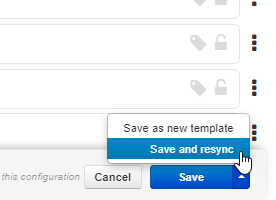
Step 2: Once you have made all changes to the phone's keys, click the Save button, then click Save and Resync to finish.
The phone will restart or resync the configuration to make the changes. That’s it!
You can log in any time to adjust your changes or add new handset customizations. If you run into questions, reach out to your team’s administrator or get in touch with Pilot at support@pilotfiber.com.
