Introduction:
DHCP stands for Dynamic Host Configuration Protocol. It's a network protocol that allows network equipment to auto assign IP addresses to various devices within a given network. In other words, enabling DHCP on your router will make it easy to provide and distribute IP addresses across your network without the hassle of manual configuration. This is ideal for a couple of reasons. First, it saves time. Second, it ensures that no two devices are assigned the same IP address. Overall, DHCP makes the network easier to manage.
Prerequisites:
In order to perform the following steps, you must be in possession of a Fortinet FortiGate 60D with an active subscriptions to Fortinet's signature database.
Step 1
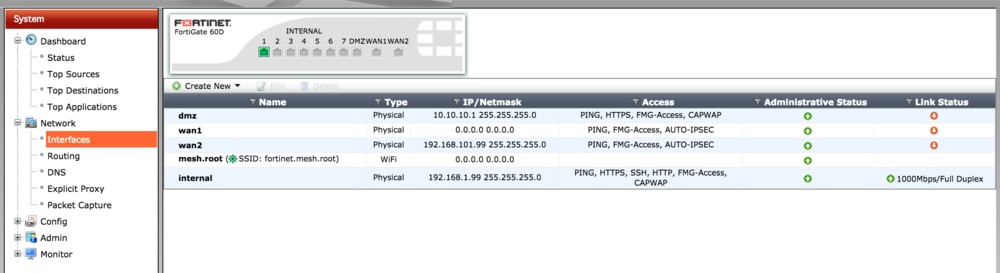
Click on Network
Step 2
Click on Interfaces
Step 3
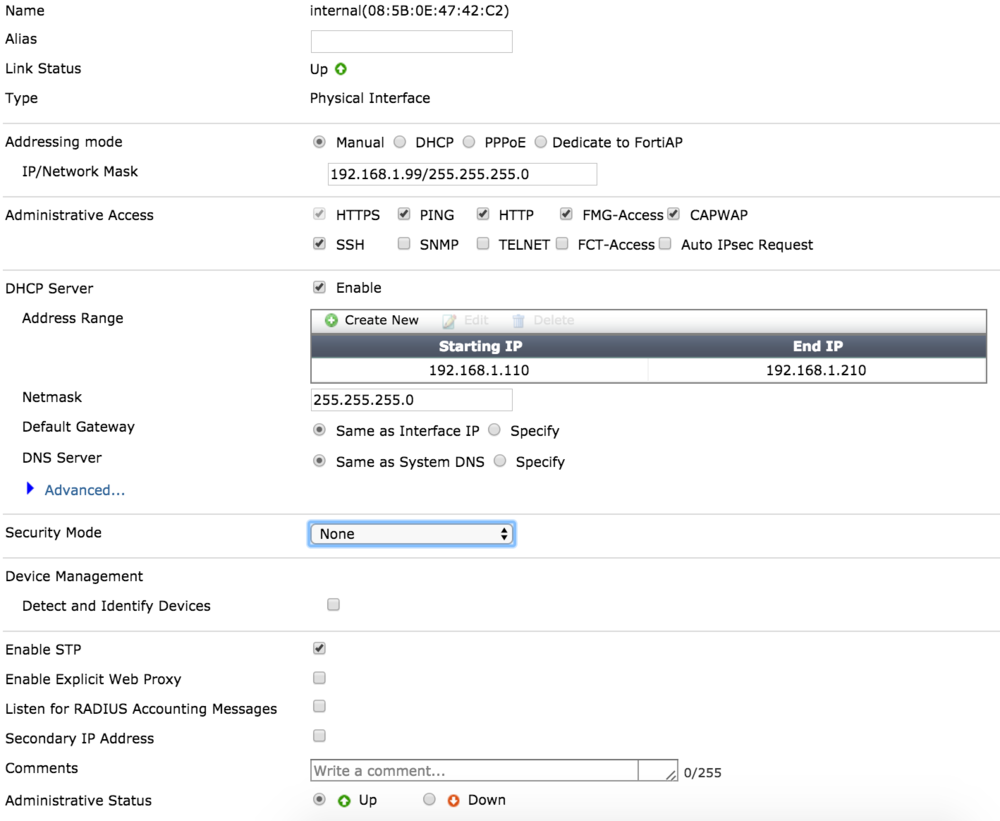
Double click on Internal to edit the interfaces
Step 4
Check the Enable box next to DHCP Server
Step 5
Change the Starting IP and End IP to the desired range
Step 6
Click OK to save your settings