Introduction
This guide takes you from start to finish on what to expect during your on-site installation.
We Provide
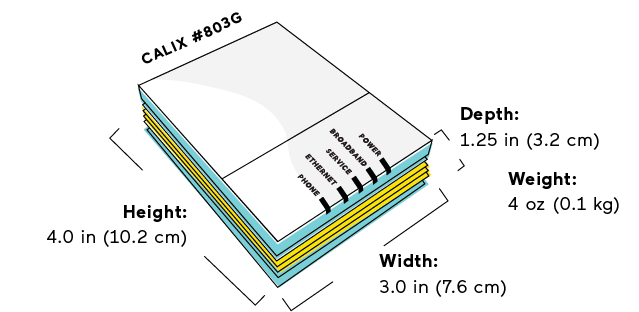 |
Pilot’s ONT is a small, black Calix device with a Pilot sticker. This device works as a passive bridge that needs to be connected to an external device such as a router or firewall. |
- Pilot’s ONT can be mounted and secured on the wall by our installation team, but is NOT rack-mountable.
- There is only one active port on the Pilot device. If you need to connect more than one device in your internal network, we recommend getting a hub or switch to create additional accessibility.
- Pilot’s ONT will be provisioned in bridge mode and provides a copper ethernet handoff designed to pair with an external device such as a router/firewall. Note: Our ethernet port does not provide power over ethernet [POE].
- Pilot’s fiber is fortified to industry standards with kevlar braiding and an outer protective jacket. This means no need for bulky plastic innerduct in your space. If you have existing innerduct, we’re happy to share––just let our installers know.
You Provide
 |
 |
| Ethernet Cable | Router / Firewall |
Space Requirements
|
Cleared wall space on the interior of IT suite for use of ladder. |
|
All closets, halls, and service rooms unlocked. |
|
Available power outlet within 3 feet of device location. |
|
Onsite contact to show and approve device termination/placement. |
Note: If you are moving into a new space, construction must be completed in IT room before installation can be scheduled.
Install Process
 |
We coordinate with building management to arrange access with your building super and confirm the day before any install is scheduled to happen. |
Once onsite, our installation team will:
- Gain basement access with the super.
- Walk through your space to confirm path of fiber with onsite contact.
- Run and secure the fiber from your space to our panel in the stairwell.
- Install equipment.
- Test the circuit to confirm healthy light levels*.
If you’re available onsite, our crew will find you and notify you as soon as the install is complete. They’ll also update your Customer Experience Associate.
* This differs from a speed test, which you’ll need to perform once Pilot’s network team has fully provisioned your service and your Customer Experience Associate has forwarded your new network details.
After Install
 |
|
Note: If you have an IT consultant helping with your internal network, we’d suggest booking a cutover appointment the day after installation.
Conclusion
Congrats! You're one step closer to a reliable, Pilot internet connection. If you run into any questions along the way, reach out to us for help.