Introduction
Before you can watch that next singing cat video online during your lunch break, there area few things that happen behind the scenes:
First, your router needs to be able to know “how” to access the Internet. This is where routing protocols come into play. Routing protocols are simply the mechanisms by which routers exchange information and access other networks where they are not directly connected. Since the Internet is just a massive collection of networks (a network of networks, if you will), you can see why these protocols are super important for routing and identification.
Utilizing these protocols helps your router communicate with other networks in a couple different ways. When static routing is assigned, a clear cut path has been designated. The other option is dynamic routing which allows a router to adapt to changes in the network. For our purposes we’re going to focus on the former (static) - where you manually configure your router with a defined path to access the internet or another network.
And, once your router knows how to access those cat videos, you can binge to your heart’s desire—or until lunch is over.
Configure a static route on your MX
Step 1: Head over to the Meraki MX Dashboard
Step 2: Hover over “Security & SD-WAN” on the left pane and choose “Addressing & VLANs” under Configure.
Step 3: Under “Routing” go to the Static routes section and click on “Add Static Route”
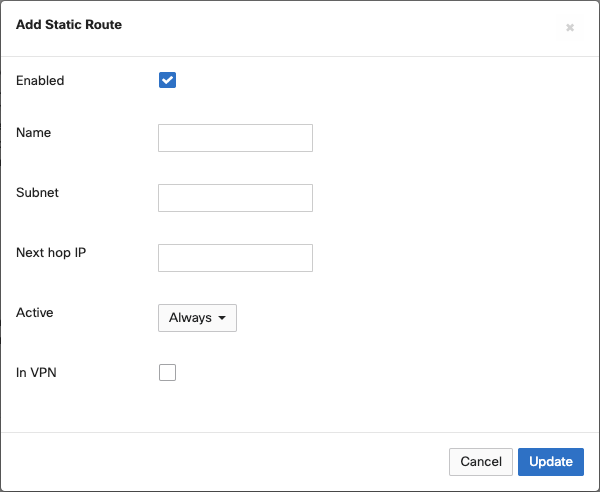
Step 4: Fill in the details for the static route:
Step 5: Once done select “Update” and then “Save” on the bottom of the Dashboard screen
Conclusion
Now that you’ve set up static routes, you can rest assured that your traffic is being routed just as you want it to be.