Introduction
You’re so close to the finish line! There’s only one step left: connecting the eero to your internal network. This short guide walks through how to do that and covers DHCP scope settings, too.
Connecting the eero to your network
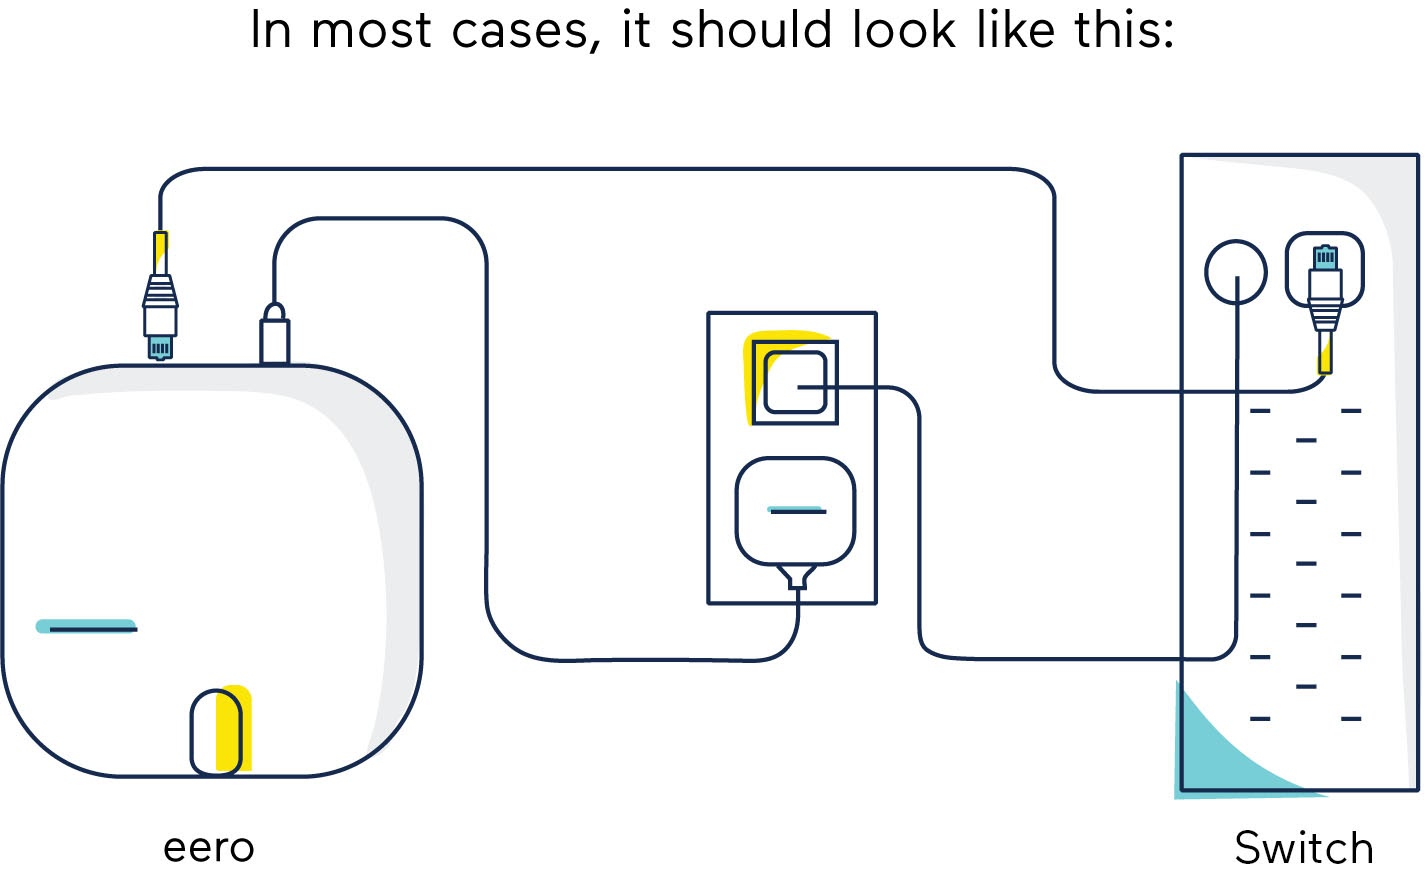
Step 1: Grab an ethernet cord and note the location of your switch (also referred to as a modem) if you have one as part of your wired infrastructure.
Step 2: After connecting your eero to the internet, take an ethernet cord and connect it to the last available port on the eero. One of the ports should already be used for your ONT.
Step 3: Plug the other end of the ethernet cord into the switch. Switches vary by brand, but the most common ones we see are Netgear and TP-Link.
DHCP scope settings
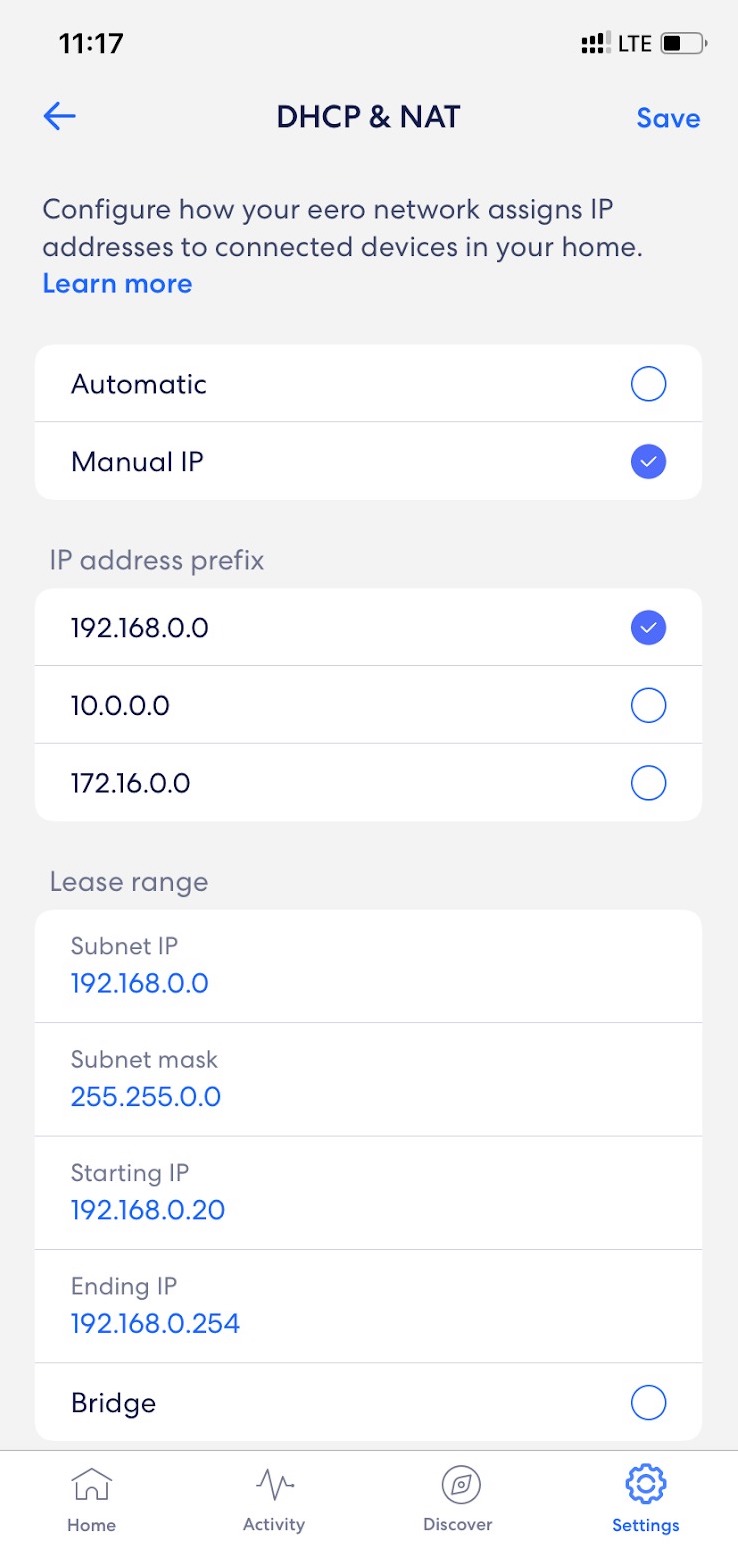
If you have specific DHCP scope settings for certain devices in your network, eero has the capability to change your IP address prefix and lease range. Follow these steps to make this change.
Step 1: Open the eero app on your mobile phone. Tap Settings in the bottom menu.
Step 2: Tap Advanced, then use the DHCP & NAT option to access IP details.
Step 3: Select Manual IP, then input the IP address range.
This is typically used on rare occasions where certain devices were already configured statically in your network.
More often than not, you’ll just want to enter the new WiFi network name and password into the settings of your device to access your connection.
Conclusion
Consider that finish line crossed! Check out this article about using even more features in the eero app.