Introduction
By default, all Cisco Meraki MX appliances have their WAN interfaces configured to automatically receive an IP address via DHCP from your upstream provider/ISP. Depending on your network setup or your ISP’s requirements though, a dynamic IP assignment might not be available and you need to have those IP addresses configured statically.
If you find yourself in that situation, follow the steps below to configure your Meraki MX’s WAN port with a static IP.
Configure WAN port with a static IP
Step 1: Connect your computer/machine to the management port on your MX
Step 2: Open a web browser and visit: http://setup.meraki.com (no internet access needed to reach it) - also known as the “local status page”
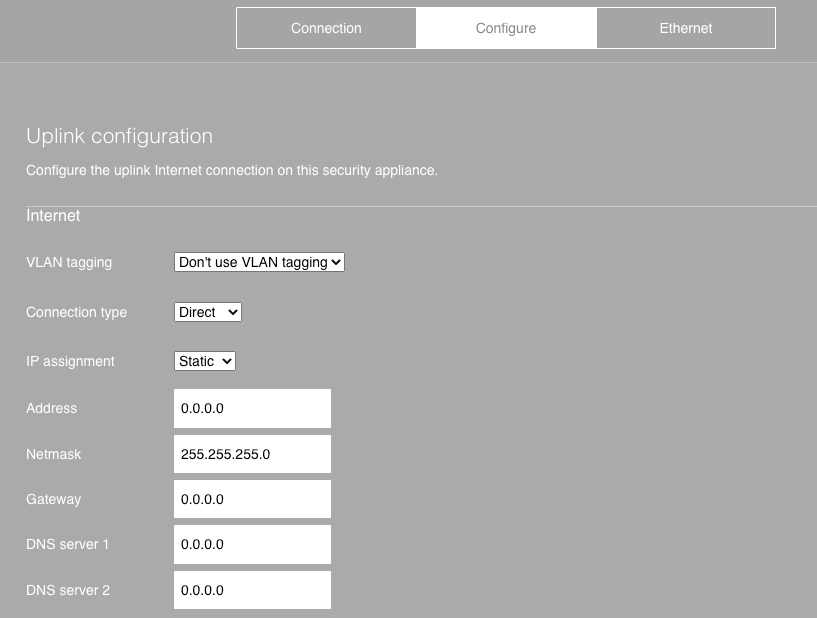
Step 3: Choose “Configure” from the top ribbon
Step 4: Under “Uplink configuration” change the “IP assignment” to “Static” for the port you’re looking to change:
Step 5: Set the Address, Netmask, Gateway and DNS servers values - changes are automatically saved.
Conclusion
You’re all set with a static IP on your Meraki MX!
Contact Pilot Support for more assistance, or check out the Support Center to see how to configure static IPs for other router types.


