Introduction
Having options in life is a good thing. The same is true for sending faxes. There are a few ways to send a fax with Pilot Voice: through email, with a fax machine, and through the Pilot web portal. We’ll cover that last option here.
Choosing a recipient
Step 1: Log in to the Pilot Fax portal. Your login name will be your email address.
Step 2: Click the Fax icon in the main navigation menu. Then select the Fax link.
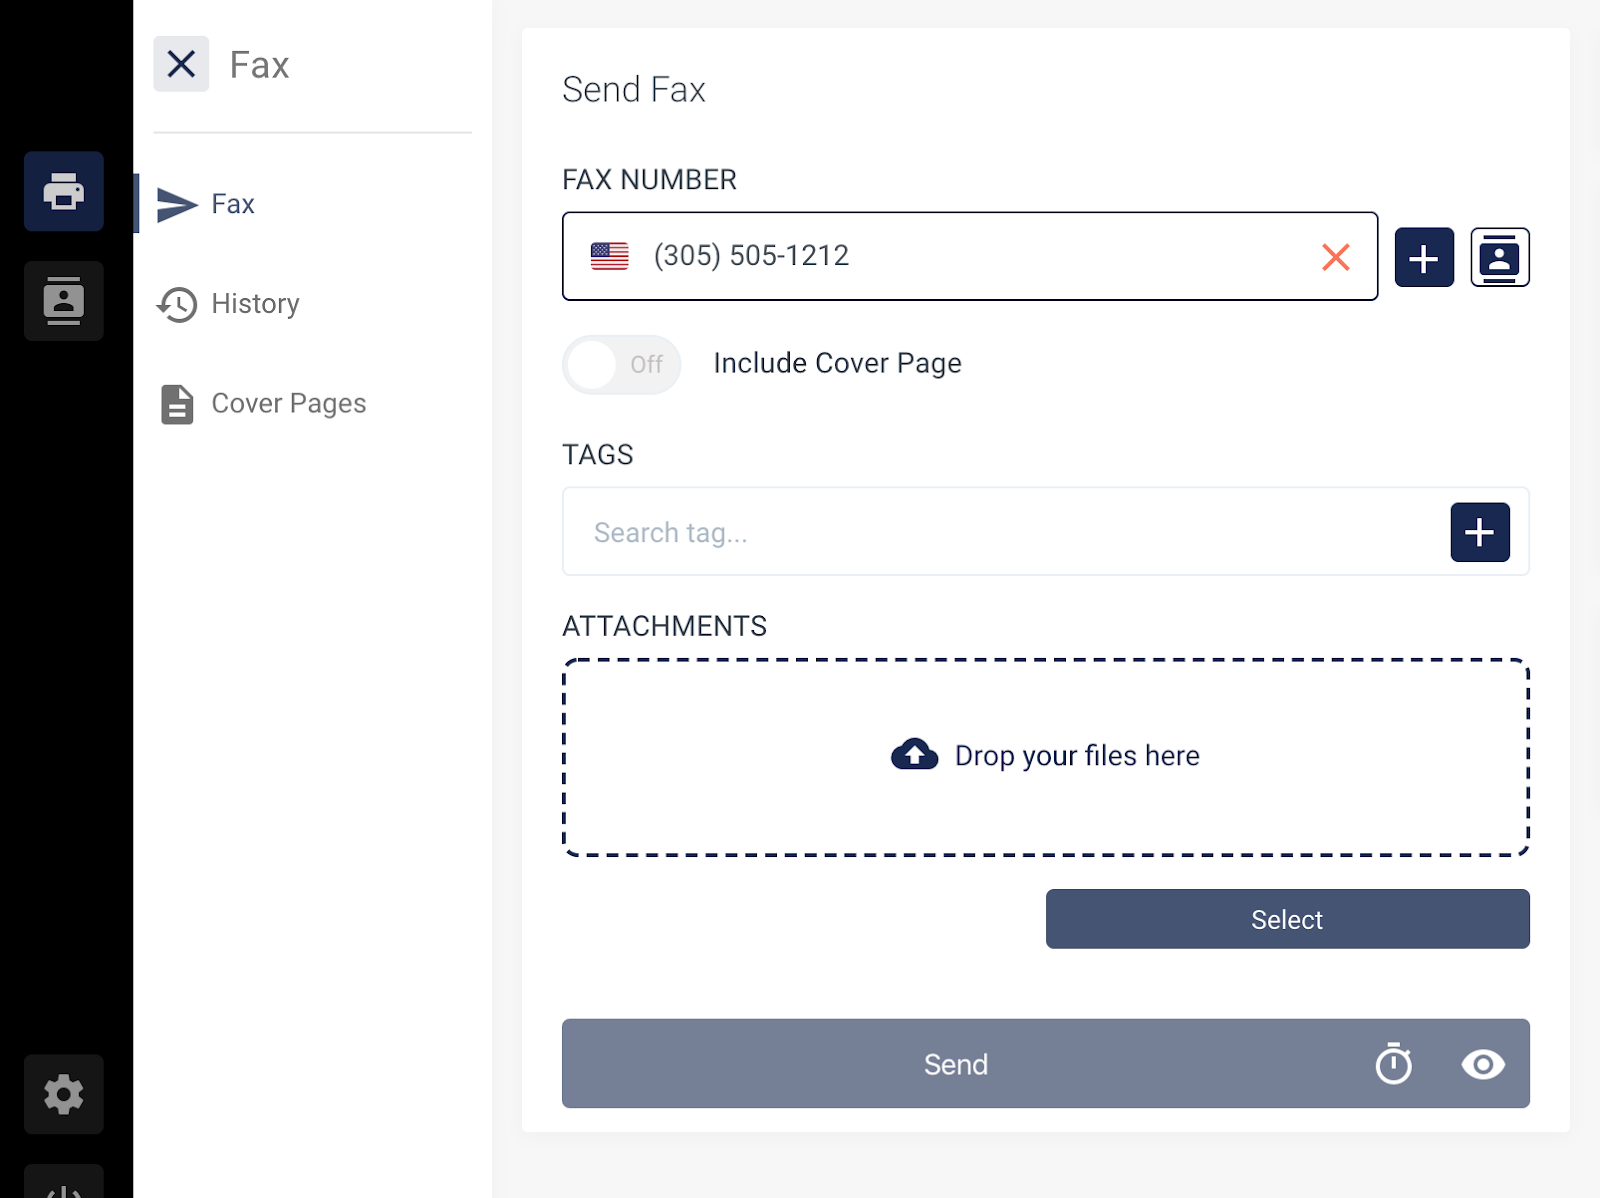
Step 3: Enter your 10-digit fax destination number in the empty field. Or, use the contact button to choose a recipient from your contact list. If you look up and add a recipient, you don’t need to type in the 10-digit number.
Attaching files
Step 4: Attach files to your fax with one of the following methods:
- Drag and drop files into the field provided
- Click the Select button and upload files from your computer
Adding a cover page
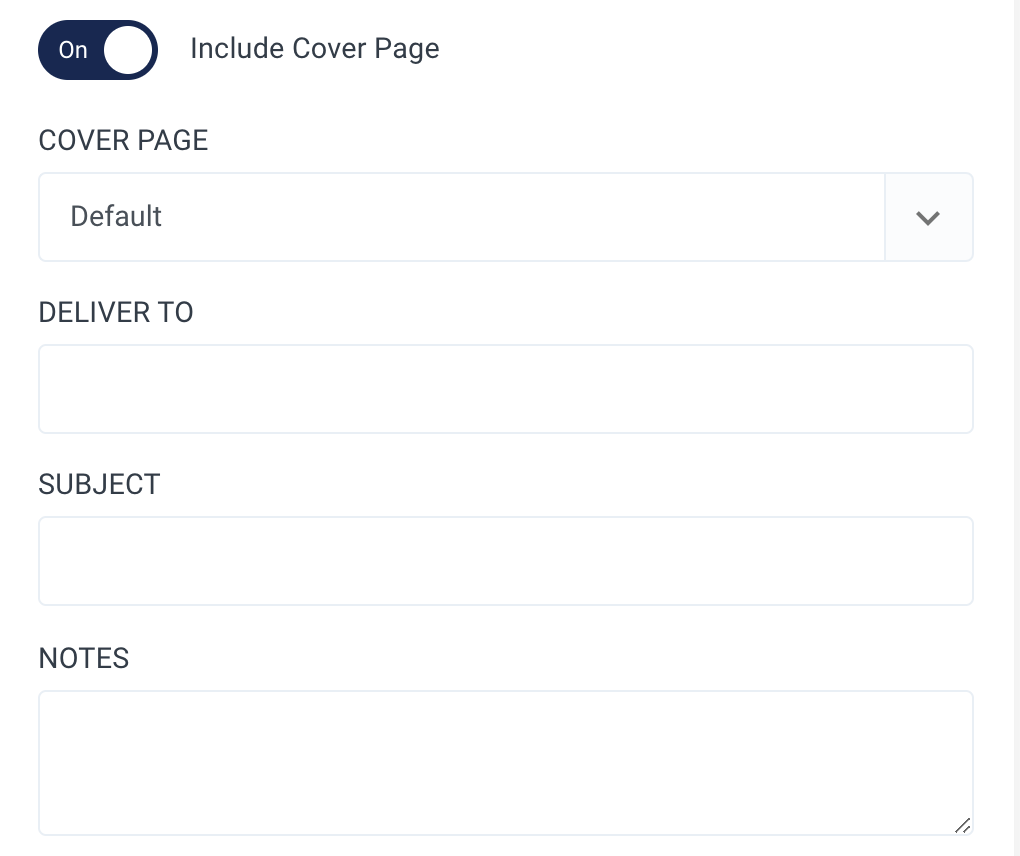
Step 5 (optional): If you'd like to include a cover page, toggle the slider to On and enter the appropriate information in the correct fields.
Tagging your message
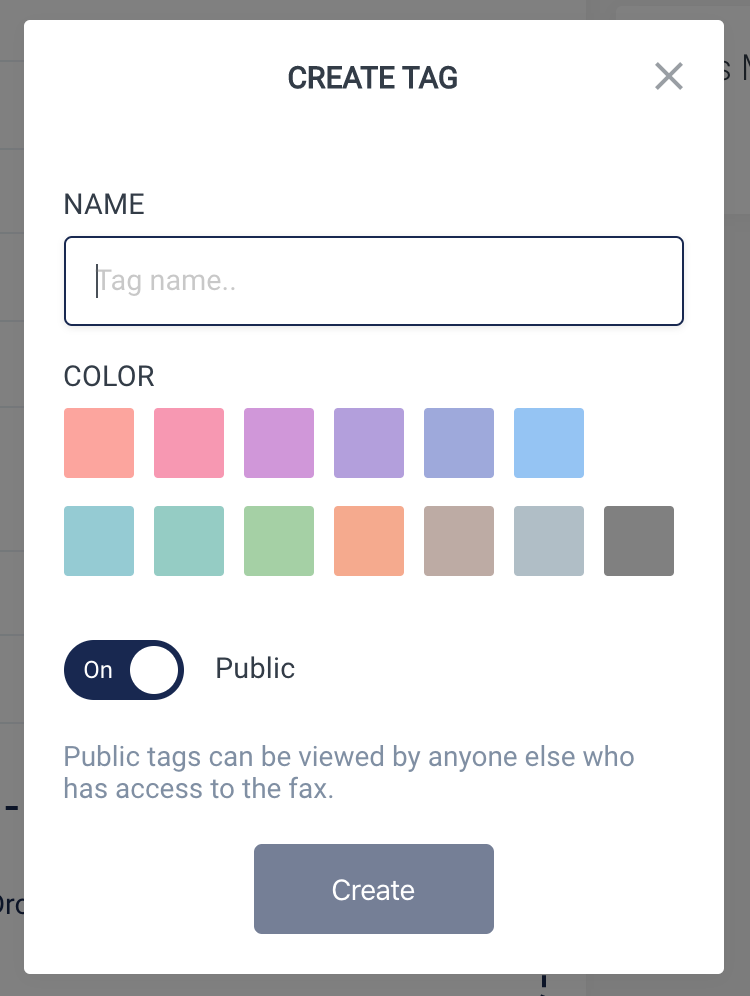
Step 6 (optional): To add a tag to the fax (this will show up in your fax history) click the Tags button and choose or create a tag. Tags help label your faxes so you can search for them later on.
Sending the fax
Step 7: Click the SEND button. You’ll see a pop-up notification confirming your fax was sent. To check the status, go to the Fax History tab.
