Introduction
Imagine a world where every time you wanted to visit Pilot’s website, you had to type in the site IP address 18.204.237.130 instead of just typing pilotfiber.com. Believe it or not, without the help of DNS, this would be the reality of web surfing every day.
Domain Name System (DNS) is the system that translates human readable website names into machine/computer readable IP addresses and can be seen as equivalent to a phonebook, but instead of keeping name to phone number records it keeps name to IP address records.
There are two ways of setting up DNS on your Meraki MX, one is via the local status page and the other via the DHCP service page within the Dashboard.
Set up DNS via local status page
The local status page settings will dictate what servers will be used for management and cloud traffic purposes only. To set up DNS this way, follow the steps below:
Step 1: Connect your computer/machine to the management port on your MX
Step 2: Open a web browser and head to the local status page (http://setup.meraki.com).
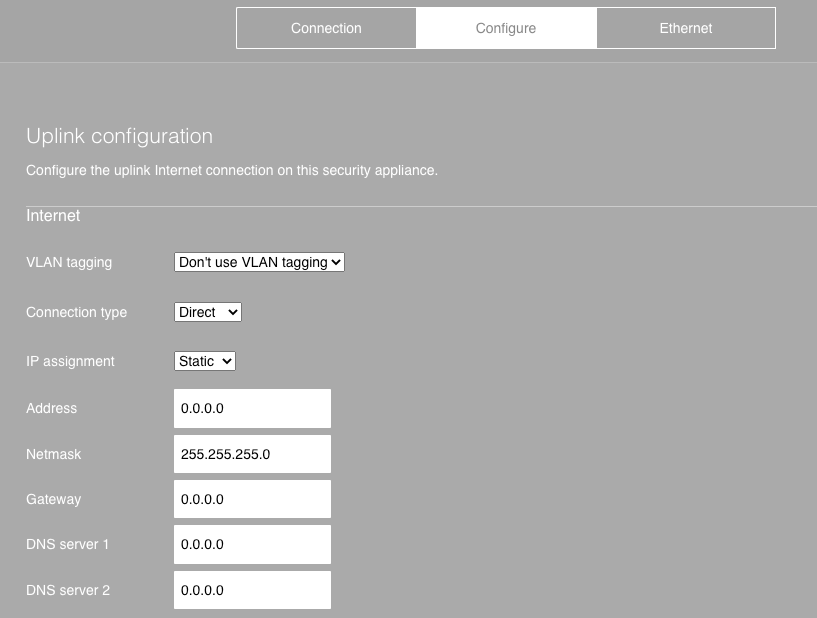
Step 3: Choose “Configure” from the top ribbon
Step 4: Under “Uplink configuration” set the DNS values as desired. Changes are automatically saved.
Set up DNS via DHCP service page
You can specify the DNS servers to be used by your network clients through the DHCP services page.
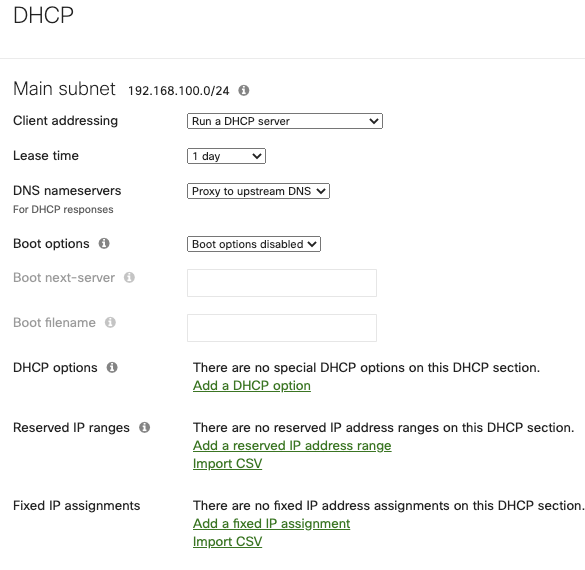
Step 1: Hover over “Security & SD-WAN” on the left pane and choose “DHCP” under Configure
Step 2: From the DHCP menu, you’ll have the option to change DNS nameservers.
Step 3: Save when done.
Conclusion
For more information or questions on how to configure DNS settings on your Meraki, reach out to Pilot Support at any time.