End User's Guide to the Pilot Voice Portal
This guide walks through all the basics of using your Pilot Voice portal. Click around to explore the different tabs. Each one contains must-know info to get started with Pilot Voice—such as navigating the web portal, managing different features like voicemail settings and answering rules, creating time frames, or reviewing call history.
First time here? We recommend starting from the top, with logging in to the portal.
Logging In
Step 1: Go to the Pilot Voice portal. Any browser is fine.
Step 2: Your login name will be in the format of extension@domain (ex. 105@pilotfiber).
- Note: To log in, you’ll need your office phone’s extension number and phone domain. If you don’t know either of these, select Forgot Login Name on the portal screen, contact your company’s IT team, or reach out to Pilot Support. Find more instructions on recovering your username here.
Step 3: Enter the password chosen during the setup of your Pilot Voice portal account. If you don’t know it or need to create a new one, follow these password recovery directions.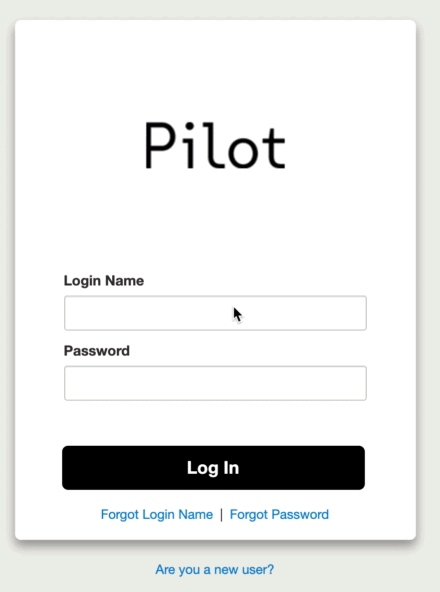
Homepage
On the home tab, you can quickly review new voicemail messages and see recent call history.
The sidebar shows details about active answering rules and active phones or devices that will ring when a call is incoming.

Messages
The messages tab is home to all voicemail messages and chats. Within this tab, you’ll see three sub-tabs for voicemail, chat, and settings. And within settings, you'll find 3 sections: inbox, greetings, and unified messaging.
Voicemail
Listen to, download, forward, save or delete your messages. A red badge shows how many messages have not been viewed.
Learn more about managing your voicemail in the portal.

Chat
View all group chats and individual messages. Similar to the voicemail tab, a red badge signals that you have an unread message.
You can also start a new conversation, reply to existing chats, or delete conversations from this tab.
Click here to learn more about group chat.

Settings: Inbox
In the inbox section within the message settings tab, you can configure inbox settings such as how voicemail messages are sorted (i.e. latest message first), including the message received time, and announcing incoming caller ID.
You can also choose to have messages in your inbox copied to other extensions.
Settings: Greetings
In the greetings section within the message settings tab, you can record or manually upload a new voicemail. You can also manage your current recording using the “recorded name” button.
Settings: Unified Messaging
In the unified messaging section within the message settings tab, you can customize your email and voicemail notifications when you get a new voicemail message.

With unified messaging, you have a few options for email notifications when a new voicemail comes in:
| Option 1: Receive a new email in your inbox with a hyperlink to the message. By clicking on the link to “Listen,” your voicemail message will open in a web browser. |  |
| Option 2: Receive an email with an audio file attachment. Here, the voicemail comes as an attached audio file for download. |

If you’re choosing to receive email notifications, you also can select what happens to the message in your voicemail box:
- Have all voicemails enter your voicemail box as new messages
- Have all voicemails route to your voicemail box as saved messages
- Have all voicemails automatically move to trash

Contacts
The contacts tab is where to find information for all of your Pilot Voice contacts. Think of this like your digital phone book. You can add new contacts, manage existing contacts, or initiate a chat with a teammate in just a few clicks.
Click here to learn more about managing your contacts.

Answering Rules
Answering rules are exactly what they sound like—and they’re super helpful for your workflow. Answering rules put you in charge of what happens when someone calls your line, which means the rules can help create a better experience for callers when you’re unable to pick up the phone.
For example, you can set up call forwarding during specific times or choose for your line to ring on multiple devices at the same time. Here, you’re also able to block specific numbers.
In the answering rules tab, you can view and modify your existing answering rules and add new ones.
Call Forwarding
Call forwarding helps route calls to the right place during specific times of the day. For example, you can use answering rules to send after hours calls to voicemail or an Auto Attendant.
Allow/Block
The Allow/Blow button gives you the choice to screen callers. In other words, you get to choose which numbers can call in and when to block others. You also have the option to block anonymous or unknown numbers, because no one has time for robocalls.

Check out these articles to learn more about call forwarding and screening/blocking calls.
Time Frames
Time frames help you set up the hours that your phone should and should not ring. Time frames are also great to set up for business hours, holiday time, vacation time and any other instances where you may not be available to take a call.
Certain time frames are “shared” which means these are used company wide. Only admins have the ability to create or edit shared time frames, but end users can apply shared time frames to their own answering rules.

Click here to learn more about creating time frames.
Phones
The phones tab is where you can easily see all the devices connected to your line. This rundown shows device name, the IP address, MAC address and Line if applicable.
You can also use this section to view device info, and add or delete a device from the portal.

Music on Hold
Give your callers something catchy to listen to while they wait on hold.
Got the perfect song in mind? Use the Music on Hold tab to customize the audio or upload your own music. Once music is uploaded, you can download, edit, or delete the current songs with the edit buttons on the song’s row.

Call History
The call history tab shows a quick view of incoming and outgoing calls over a period of time. Just set the date range (up to 31 days) and you’ll see calls within that period. To save the list, click the export button to generate a CSV file.

Click here to learn more about exporting call history.
Additional Resources
And that’s a wrap of the basic features you can access and tweak from the portal. Now that you know your way around, you can explore other popular articles geared toward supercharging your workflow.
Up next:
- Understand user roles within Pilot voice
- Star codes and shortcuts
- Set up single sign on
- Poly VVX 250 End User Guide
- Poly VVX 450 End User Guide
Looking for something you don’t see here? Try searching in the Support Center or reach out to the Pilot team here.
